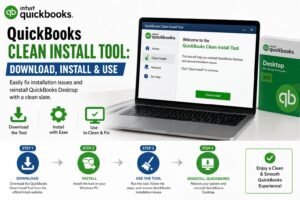
QuickBooks Desktop may sometimes develop installation, update, or program-related problems that cannot be resolved with a standard reinstall. In these situations, the QuickBooks Clean Install Tool can help remove or rename QuickBooks installation components so you can perform a fresh installation.
A clean installation is particularly useful when QuickBooks still shows errors after uninstalling and reinstalling the program normally. It can also help when damaged installation folders or remnants of an earlier installation interfere with a new setup.
This guide explains what the QuickBooks Clean Install Tool is, when to use it, how to download and install it, how to rename QuickBooks folders manually, and how to reinstall QuickBooks Desktop afterward.
Important: The Clean Install process is intended for QuickBooks Desktop on Windows. Before removing or renaming program folders, create a backup of your QuickBooks company files and make sure you have your QuickBooks license and product information available.
What Is the QuickBooks Clean Install Tool?
The QuickBooks Clean Install Tool is a troubleshooting utility designed to help remove or rename QuickBooks Desktop installation components before reinstalling the program.
A normal uninstall removes the QuickBooks application, but remnants of the previous installation can sometimes remain on the computer. If those components are damaged or incorrectly configured, simply installing QuickBooks again may not resolve the underlying problem.
The clean-install process provides a way to start with fresh QuickBooks program folders.
According to Intuit’s current reinstall guidance, reinstalling QuickBooks does not affect your company data. When a standard reinstall isn’t enough, you can manually remove QuickBooks and rename the installation folders so that the new installation creates fresh folders.
The process generally involves:
- Backing up important QuickBooks data.
- Uninstalling QuickBooks Desktop.
- Using the Clean Install Tool when available for your version and setup.
- Renaming remaining QuickBooks installation folders if necessary.
- Reinstalling the correct QuickBooks Desktop version.
- Opening and verifying your company files.
The goal is to eliminate damaged installation components without deleting your accounting data.
When Should You Use the QuickBooks Clean Install Tool?
You shouldn’t use a clean installation every time QuickBooks displays an error. Many problems can be repaired using QuickBooks Tool Hub, Quick Fix my Program, updates, or the QuickBooks Install Diagnostic Tool.
A clean install is more appropriate when ordinary troubleshooting has not fixed a persistent installation or program problem.
Consider using the clean-install process when:
- QuickBooks Desktop will not install correctly.
- QuickBooks repeatedly fails during an update.
- QuickBooks crashes immediately after launching.
- A normal uninstall and reinstall does not resolve the problem.
- Damaged installation folders continue causing errors.
- QuickBooks displays recurring installation errors.
- You have remnants of an older QuickBooks installation.
- QuickBooks will not open even after repairing the program.
- You need to reinstall the same QuickBooks Desktop version from scratch.
For installation problems, Intuit also recommends using the QuickBooks Install Diagnostic Tool through QuickBooks Tool Hub. It can address common installation issues and may take up to about 20 minutes to complete.
Back Up Before You Start
Although the clean-install process is focused on the QuickBooks program rather than your company file, you should always create a backup before major troubleshooting.
Keep a copy of your .QBW company file and any other important QuickBooks data in a safe location.
Also have your:
- QuickBooks product version
- License number
- Product number
- Intuit account information
- QuickBooks installation file
available before starting the reinstall.
How to Download QuickBooks Clean Install Tool?
The exact download method can vary by QuickBooks Desktop version and the troubleshooting workflow recommended for your installation.
For the safest approach, download QuickBooks Desktop and related troubleshooting tools from Intuit’s official QuickBooks support resources, rather than third-party download websites.
Intuit’s current download instructions direct users to the Downloads & Updates page, where you select your country, QuickBooks product, and version before downloading the appropriate installation file.
Before Downloading
Make sure you know:
- Which QuickBooks Desktop year you use
- Your QuickBooks edition, such as Pro, Premier, Accountant, or Enterprise
- Your country or regional version
- Your license and product numbers
- Whether you’re installing on a standalone computer or network
If you’re using QuickBooks Tool Hub for the troubleshooting process, download the current Tool Hub from Intuit. Intuit’s current support documentation says to close QuickBooks, download the latest Tool Hub, open QuickBooksToolHub.exe, and follow the installation prompts.
Avoid downloading QuickBooks installation utilities from unknown websites. Third-party downloads may be outdated, modified, or incompatible with your QuickBooks version.
How to Install the QuickBooks Clean Install Tool
After downloading the appropriate QuickBooks troubleshooting utility or Tool Hub, install it on the same Windows computer where QuickBooks Desktop is experiencing the problem.
Step 1: Close QuickBooks
Before running any repair or installation utility:
- Save your work.
- Close QuickBooks Desktop.
- Make sure your company file is closed.
- Close other applications that may interfere with the installation.
Step 2: Install QuickBooks Tool Hub if Needed
If you’re using Tool Hub as part of the repair process:
- Locate QuickBooksToolHub.exe.
- Double-click the file.
- Follow the on-screen instructions.
- Accept the license agreement.
- Complete the installation.
- Open QuickBooks Tool Hub.
Intuit recommends keeping the installer open until the installation finishes, particularly when tools are downloaded in the background.
Step 3: Choose the Appropriate Repair Tool
Depending on the problem, Tool Hub may provide options such as:
- Quick Fix my Program
- QuickBooks Install Diagnostic Tool
- Program Problems
- Installation Issues
- Other troubleshooting utilities
For installation-related problems, the Install Diagnostic Tool is specifically designed to repair common installation issues.
How to Use the QuickBooks Clean Install Tool
The clean-install process should be performed carefully because it involves removing QuickBooks Desktop and preventing the new installation from using damaged installation folders.
A typical workflow is:
Step 1: Uninstall QuickBooks Desktop
Open the Windows Start menu and search for Control Panel.
- Select Programs and Features or Uninstall a Program.
- Find your QuickBooks Desktop version.
- Select Uninstall/Change.
- Select Remove.
- Select Next.
- Follow the instructions to complete the uninstall.
If Windows does not allow you to remove QuickBooks, sign in with an administrator account or an account with appropriate administrative permissions. Intuit’s reinstall instructions recommend administrator access when the uninstall option isn’t available.
Step 2: Run the Clean Install Process
If your QuickBooks version and troubleshooting workflow provide the Clean Install Tool, launch it and follow its on-screen instructions.
The tool will guide you through selecting your QuickBooks Desktop version and cleaning up the relevant installation components.
After completing the process, restart Windows if prompted.
Step 3: Reinstall QuickBooks Desktop
Once the old installation components have been removed or renamed, install QuickBooks Desktop again using the correct installer.
This allows the installation program to create fresh program folders instead of relying on potentially damaged folders from the previous installation.
How to Rename QuickBooks Installation Folders
If the Clean Install Tool isn’t available or doesn’t resolve the problem, Intuit provides a manual method for renaming QuickBooks installation folders.
- First, uninstall QuickBooks Desktop.
- Then enable hidden files in Windows File Explorer and locate the relevant QuickBooks folders.
- Common locations include:
- C:\ProgramData\Intuit\QuickBooks (year)
- C:\Users\(current user)\AppData\Local\Intuit\QuickBooks (year)
- C:\Program Files\Intuit\QuickBooks (year)
- C:\Program Files (x86)\Intuit\QuickBooks (year)
The exact folder location can vary depending on your QuickBooks version and whether you’re using a 32-bit or 64-bit installation. Intuit lists these locations in its current reinstall instructions.
Rename the Folder
- Open File Explorer.
- Navigate to the appropriate QuickBooks folder.
- Right-click the folder.
- Select Rename.
- Add old to the end of the folder name.
For example:
- QuickBooks 2024
- Can become:
- QuickBooks 2024 old
Renaming the folder prevents the new installation from using the existing folder.
What If Windows Won’t Let You Rename the Folder?
An active QuickBooks process may be using the folder.
Open Task Manager and look for QuickBooks-related processes. Intuit’s reinstall instructions specifically identify processes such as:
- QBDBMgrN.exe
- QBDBMgr.exe
- QBCFMonitorService.exe
- Qbw32.exe
If necessary, end the relevant process and try renaming the folder again.
If you are unsure about ending Windows processes, contact an IT professional before proceeding.
How to Reinstall QuickBooks Desktop After Using the Tool
After completing the clean-install process, download the correct QuickBooks Desktop installer and reinstall the software.
Intuit’s current installation process requires an active internet connection and the QuickBooks installation file. For a standalone installation, open QuickBooks.exe, select Express install, and continue through the prompts.
For a network or multi-user environment, choose Custom and Network Options instead. This allows you to specify whether the computer will be a workstation, a server that stores company files, or a computer that only hosts the QuickBooks Database Server Manager.
After Installation
Once QuickBooks Desktop is installed:
- Open QuickBooks.
- Sign in if prompted.
- Activate the product.
- Download the latest available updates.
- Open your company file.
- Verify that your accounts and transactions are available.
- Test the functions that previously caused the problem.
If you’re using QuickBooks in a multi-user environment, verify that hosting and network configuration are correct before allowing other workstations to connect.
Final Thoughts
The QuickBooks Clean Install Tool can be an effective solution when standard troubleshooting and a normal reinstall fail to resolve persistent QuickBooks Desktop installation problems. The process essentially gives QuickBooks a fresh installation environment by removing or renaming old program components.
Before you begin, back up your company file, confirm your QuickBooks version and license information, and download the appropriate installer from Intuit. If the clean installation doesn’t solve the problem, use QuickBooks Tool Hub’s repair and diagnostic utilities before making more advanced Windows changes.
For the latest installation and download instructions, refer to Intuit’s current QuickBooks Desktop documentation, since available versions, tools, and installation procedures can change over time.